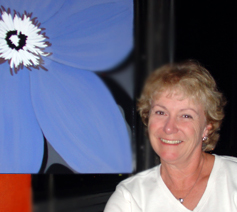
Art projects and activities will be shared as well as opinions about the current state of arts in public schools and homeschools. Visit www.brightring.com for current information on MaryAnn Kohl and her books of art for children.
Wednesday, January 17, 2007
Art: Exploring and Discovering is Important
MaryAnn Kohl believes, as research shows, that creating and exploring and discovering through art is important for their development. It is not how their art turns out that matters, but rather, what they learn and experience while participating in the creative process that matters.
Subscribe to:
Post Comments (Atom)
MaryAnn Kohl

author of twenty books of art projects and activities for kids of all ages
Welcome!
About the Author, Educator, and Presenter

- Bright Ring, art book author MaryAnn Kohl
- Bellingham, WA, United States
- Bright Ring Publishing was founded in 1985 with the first book by MaryAnn Kohl titled: Scribble Cookies: Creative Independent Art Experiences for Children. MaryAnn is the author of 20 books on art activities for children that value the process of creative art more than the finished product. View MaryAnn's books and sample art activities from all of her books at: http://www.brightring.com
MaryAnn Presents!
MaryAnn Kohl is available to travel to your location and host a keynote presentation followed by a hands-on art workshop on the topic of your choice. Favorite presentations currently include: "Enhancing Literacy Through Easy Art Experiences" and "Kids Discover the Great Masters". Check MaryAnn's website for full information on fees and meeting your particular needs. http://www.brightring.com
4 comments:
An easy fun art idea for young kids:
Place cotton balls on a tray on the table. Pour a little white glue (Elmer's Glue) in a small cup or jar lid. The child simply dips the cotton ball into a little glue and presses it to a paper plate. Add lots and lots of cotton balls to the plate! Let dry. Tah Dah!!
No paint? Fill a bucket with water. Take a big brush and go outside and "paint" rocks, walls, doors, sidewalks, everything. It's fun to paint because the designs disappear as the water evaporates. Free and easy art activity!
Dark Sugar Chalk: art idea
Dark Sugar Chalk
Materials:
• colored chalk
• black paper or black matte board (or any dark color)
• 1/3 cup (70g) sugar dissolved in 1 cup (230 ml) water
• cotton balls, optional
Art Process:
1. Soak the chalk sticks in the cup of sugar water for five to ten minutes. This adds brilliance to the color and helps resists smudging.
2. Draw on the black paper with the sugar chalk. Lines can be bold and bright or light and blurry.
3. Brush chalk marks with cotton balls as an optional art technique.
Variations:
• Theme Idea: Make a spooky fall drawing. The black background will make the colors seem to glow.
• Use other colors and try different textures of paper.
• Paint the paper with a mixture of canned milk and liquid starch. Draw on the wet paper for a sparkling effect.
Hint: Chalk is inherently smudgy, but the sugar-water mixture will help reduce smudging.
This project comes from the book Preschool Art, and is printed with the permission of the author.
© 2007 MaryAnn Kohl Permission given for single reprint of this project for classroom use, but not for multiple copies or distribution.
Scribble Dabble - from the book, Primary Art
(C) 2006 MaryAnn Kohl. Permission granted for classroom or personal use, not for multiple copies or distribution.
Directors' Choice award Primary Art is the Winner of the Early Childhood News Directors’ Choice Award 2005!
1. Pre-Step - For budding artists:
Peel masking tape from a roll and tear off. Stick to paper.
Materials:
masking tape
choice of construction paper (any color, including white)
2. Preliminary Art Experience - Scribble Dabble:
Stick masking tape in a design on paper, and scribble over the paper and tape with crayons or markers. When finished, remove the tape to see the remaining design!
Materials:
masking tape
choice of construction paper (any color, including white)
crayons or colored markers
Process:
1. Stick strips of masking tape to a sheet of construction paper in any design. Stick the tape lightly instead of pressing hard to make it easier to remove the tape in step four.
2. Scribble vigorously over the entire paper and tape, changing colors frequently.
3. When the paper is filled with color, carefully and slowly peel the masking tape away revealing the remaining design.
3. Primary Art Experience - Peel Away Tape Design:
Stick masking tape on a piece of mat board, embellish the open spaces with color, and then peel away the tape for a final design.
Materials:
square of white mat board
masking tape (blue painter’s masking tape works best)
crayon, paint, colored marking pens
scissors
Process:
1. Stick strips of masking tape to a square of mat board in an intentional, planned design. Employ features of design by crossing the tape over itself, overlapping strips, and tearing off small pieces to stick to the mat design. It is important to plan to leave areas of white mat board showing between tape pieces.
2. Color the spaces left between the tape-lines with crayon, paint, or colored markers. The colors may be solid, or patterns and designs may be drawn to fill in the spaces.
3. Carefully and slowly peel away the tape to see the stencil effect remaining on the mat board. (Tape may be left on the work instead, if preferred.)
Other tape and stencil ideas:
• Spray the masking tape design with thinned tempera paint or liquid watercolor paint. Then remove the making tape.
• Create with contact paper instead of tape. Peel away after coloring the spaces and areas outside the contact paper.
• Tape designs on a blank t-shirt. Color in the open spaces with fabric marker. Then peel off the tape.
Post a Comment